How to Draw a Fish
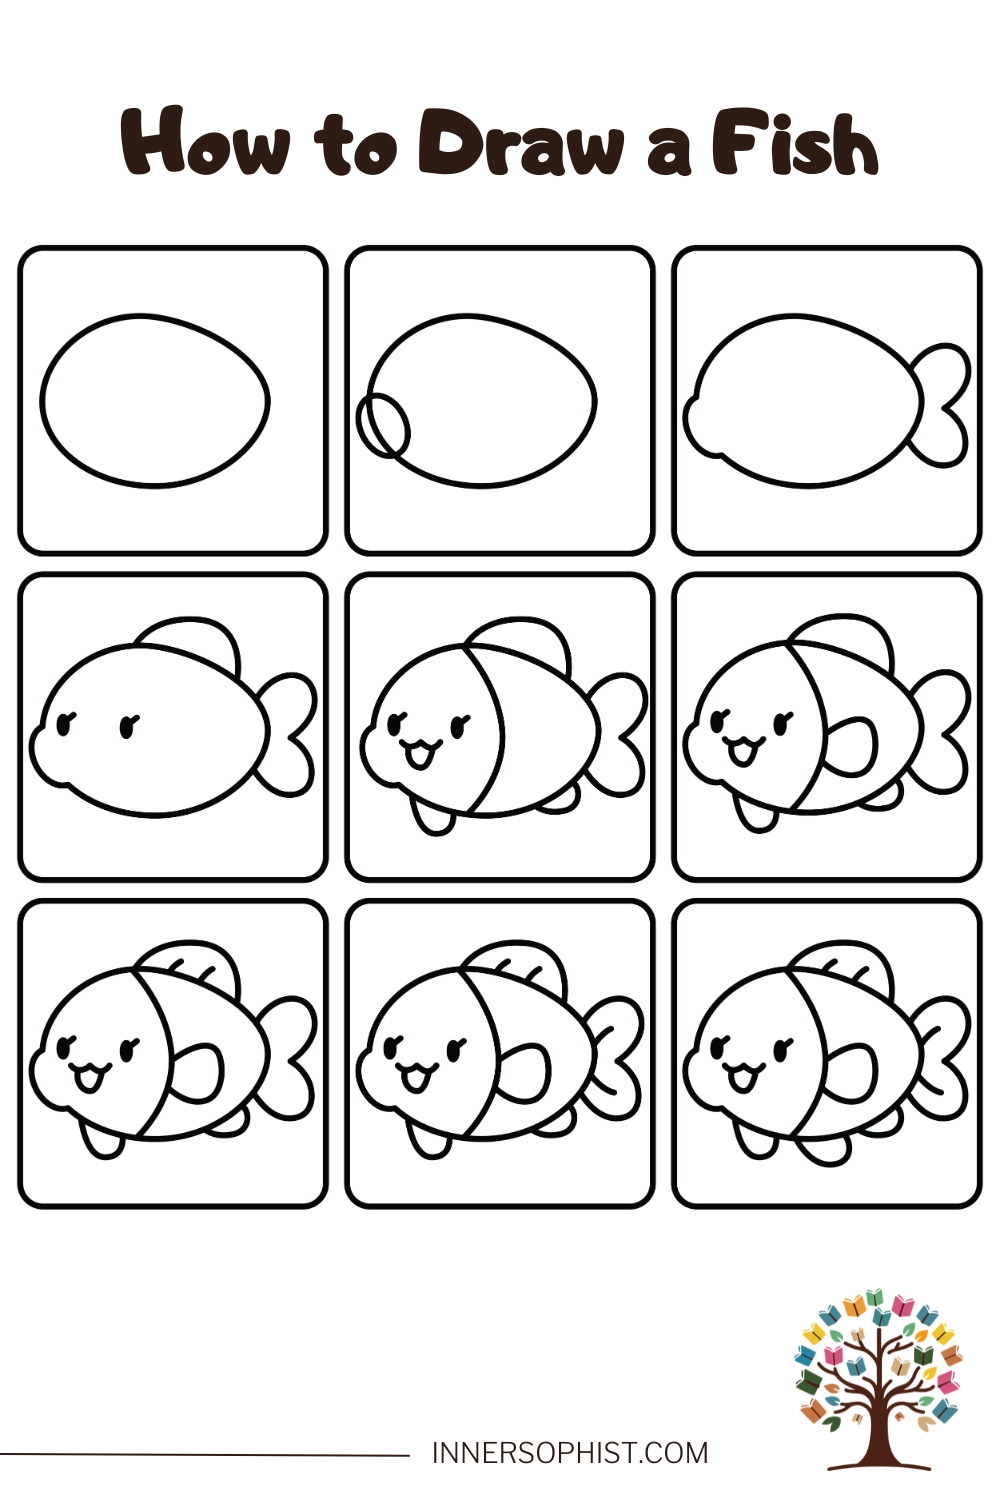
Dive into the wonderful world of underwater art with this cheerful kawaii fish tutorial! With its chubby body, sweet little fins, and happy smile, this little swimmer is sure to bring joy to any sketchbook. Follow the simple nine-step guide below at your own pace. Grab your favorite drawing tools and let us bring this adorable aquatic friend to life!
What you'll need
Drawing paper or sketchbook
Pencil and eraser
Black fine-liner or marker
Colored pencils, crayons, or markers
Pro tips
Sketch your initial ovals very lightly so you can easily erase extra guide lines later.
Place the eyes low on the face and keep them wide apart to maximize the cute kawaii look.
Feel free to color your fish with bright tropical shades like orange, turquoise, or pastel pink.
Follow the steps
Each step matches one panel in the sheet above — draw along at your own pace.
- 1
Draw Body Oval
Lightly sketch a wide, smooth oval tilted slightly to form the main shape of the fish's body.
- 2
Add Mouth Guide
Draw a small circle overlapping the front left edge of the body to mark out the rounded snout.
- 3
Outline Tail Fin
Blend the snout into the body profile, erase overlapping lines, and sketch a two-lobed tail fin on the back.
- 4
Add Fin and Eyes
Draw a curved dorsal fin along the top of the body, then add two dark, sparkly eyes with tiny eyelashes.
- 5
Draw Face and Fin
Add a curved gill line behind the face, a happy open mouth, and a small curved fin beneath the front belly.
- 6
Add Pectoral Fin
Sketch a smooth, rounded side fin resting right in the middle of the fish's body.
- 7
Detail Top Fin
Draw two soft curved lines inside the top dorsal fin to create lovely fin texture.
- 8
Clean Up Lines
Check your fish's outlines, making sure the shapes are neat and clear before adding the final detail.
- 9
Add Rear Fin
Draw a second small rounded fin along the lower belly near the tail to complete your cute swimming fish.
Frequently asked questions
More to draw
Keep the pencil moving with these cute tutorials.