How to Draw a Pumpkin
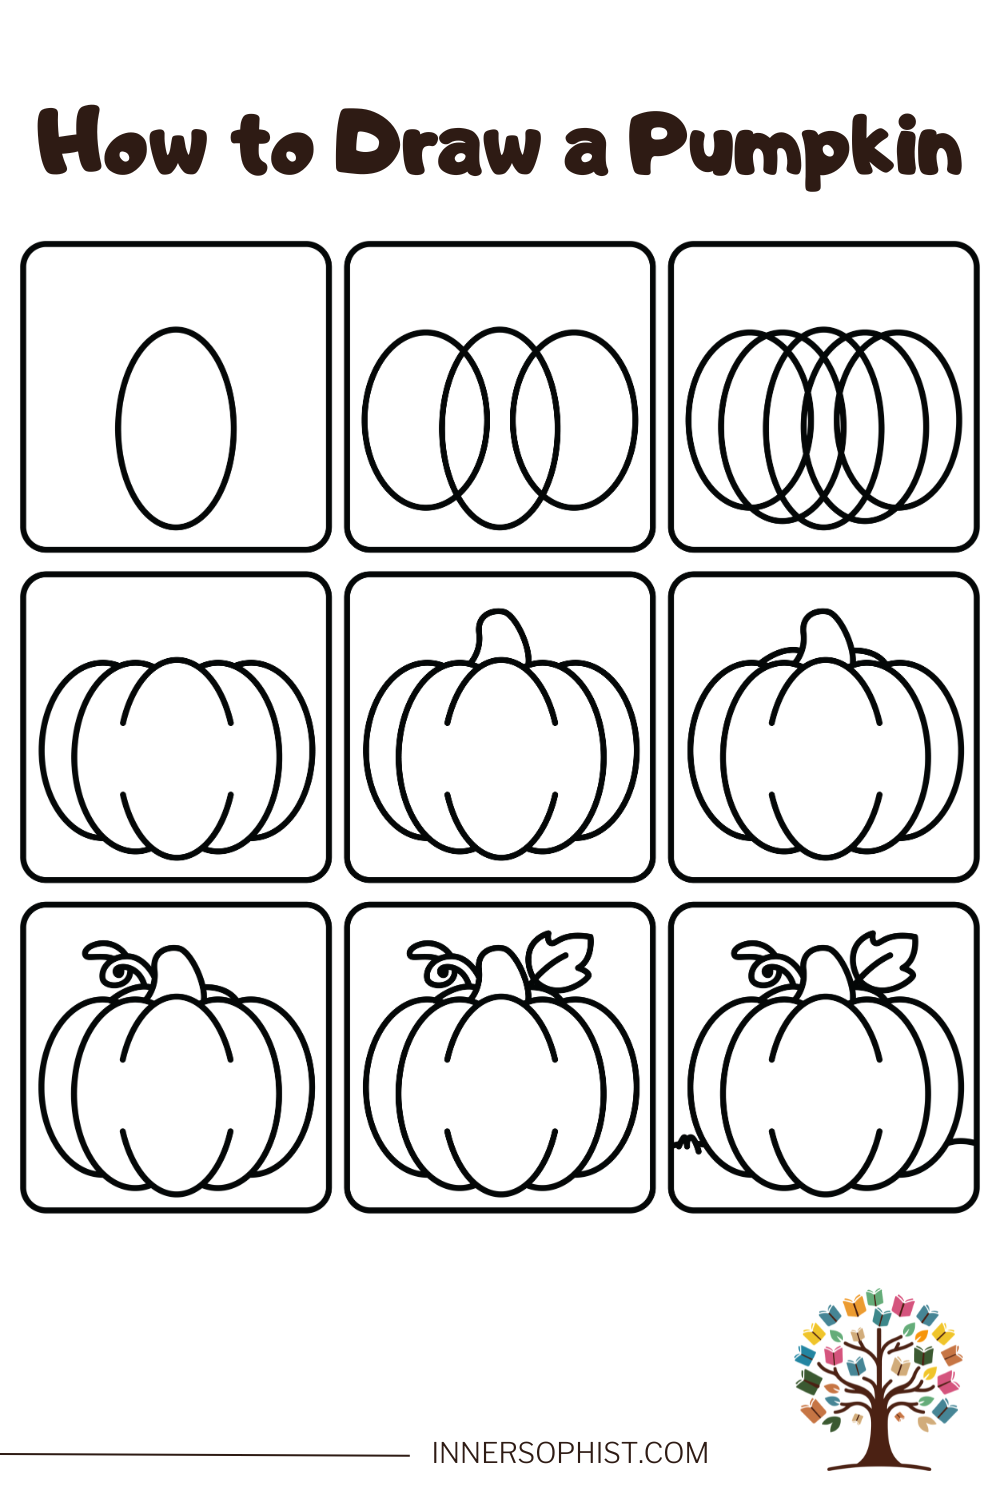
Pumpkins are one of the most fun and recognizable shapes to draw, especially for cozy autumn days and Halloween crafts. In this tutorial, you will discover how simple geometric shapes make sketching a rounded, ribbed pumpkin completely stress-free. Grab your favorite pencil and paper, and follow along with each panel to create your very own fall pumpkin step by step.
What you'll need
Pencil
Eraser
Drawing paper
Black outline marker
Orange, green, and brown crayons or colored pencils
Pro tips
Draw your first guide ovals very lightly so they are easy to erase later.
Do not worry about perfect symmetry, as real pumpkins are naturally bumpy and unique.
Add warmth by coloring the ridges with deep orange and shading the creases with light brown.
Follow the steps
Each step matches one panel in the sheet above — draw along at your own pace.
- 1
Draw Central Oval
Lightly sketch a tall, vertical oval in the center of your page to form the middle ridge of your pumpkin.
- 2
Add Side Ovals
Draw two matching ovals overlapping the center shape, one on the left and one on the right, positioned slightly higher.
- 3
Add Outer Ovals
Sketch two more ovals on the very outer edges to give your pumpkin its full, rounded width.
- 4
Shape Pumpkin Ribs
Erase overlapping inner lines and connect the outer edges with curved, scalloped bumps at the top and bottom.
- 5
Draw The Stem
Add a thick, slightly curved stem rising from the center dip along the top rim.
- 6
Add Stem Base
Draw a small rounded collar line around the base of the stem to give it depth where it joins the pumpkin.
- 7
Add Curled Vine
Sketch a playful swirling tendril curving outward from the left side of the stem.
- 8
Draw A Leaf
Attach a simple lobed pumpkin leaf to the right side of the stem, detailing a small center vein.
- 9
Add Ground Details
Draw a soft horizontal ground line and a small tuft of grass along the bottom to anchor your pumpkin.
Frequently asked questions
More to draw
Keep the pencil moving with these cute tutorials.